
Bean sprouts are a healthy, crunchy addition to many dishes, and growing them at home is both fun and rewarding. If you’re looking for a convenient way to have a fresh supply of these little nutrition powerhouses, you’re in the right place. In this guide, we’ll show you how to cultivate bean sprouts using plastic bottles, which is a simple and eco-friendly method. Not only does it save you money, but it also allows you to enjoy the freshness of home-grown sprouts year-round.
MATERIALS NEEDED
To get started, you’ll need a few basic materials:
Plastic bottles (1-liter or 2-liter bottles work well)
Dried mung bean or soybean seeds (readily available at grocery stores)
A pair of scissors
A bowl or tray for catching excess water
Clean water
Ensure the plastic bottles are thoroughly cleaned and sanitized before use to prevent any bacterial contamination during the sprouting process.
THE STEP-BY-STEP GUIDE
Step 1: Prepare the Beans And Bottles
Take your plastic bottles and remove the labels. Rinse them out with warm, soapy water and rinse again with clean water. This step is essential to ensure that your sprouts remain free from any contaminants. With your scissors, cut off the top of each plastic bottle. This will create a small container for your sprouts while allowing for adequate air circulation.
Now, take your dried mung bean or soybean seeds. For 1-liter bottles, you’ll need approximately 1-2 tablespoons of seeds, and for 2-liter bottles, use 2-3 tablespoons. Rinse the seeds thoroughly in cold water to remove any dust or debris.
Step 2: Distribute The Beans
Place the rinsed seeds into a container or bowl. The seeds should be covered with enough water and allow them to soak for about 8-12 hours or overnight. This process helps to kickstart the germination.
After soaking, you should drain the seeds and distribute them evenly into the cut plastic bottles. It’s essential not to overcrowd the seeds, and a single layer of seeds is sufficient. This way, each sprout will have space to grow.
Step 3: Cover With Caps And Towels
Secure the tops of the plastic bottles that you previously cut off. You can use the bottle caps for this or a piece of plastic wrap secured with a rubber band. Place the bottles in a dark, cool place, such as a cupboard or pantry. Cover them with a clean, damp kitchen towel to keep the environment humid and dark – ideal conditions for sprouting.
Step 4: Watering And Draining
Twice a day, carefully remove the towels and turn the bottles upside down over the sink. Allow any excess water to drain out completely. This step helps prevent mold or bacterial growth. Now you place the bottles back in their dark, cool location, recover them with the damp towels, and continue the process of rinsing and draining twice a day.
Step 5: Harvest Sprouts
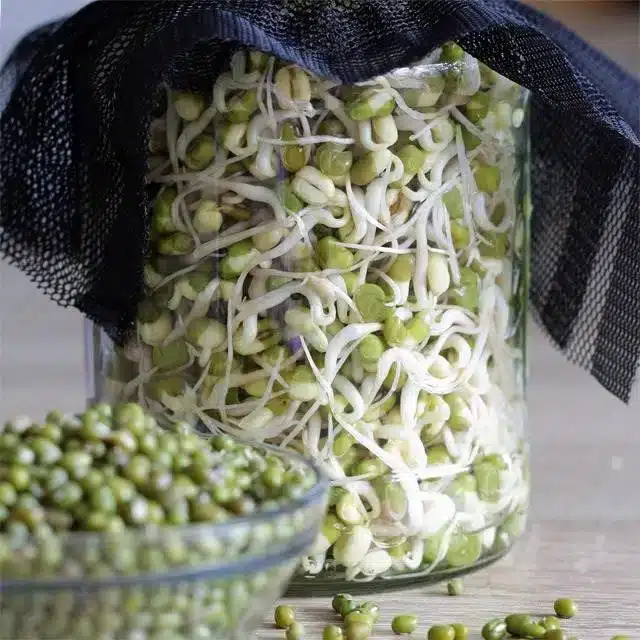
In about 3-7 days, depending on the temperature and the type of beans you’ve chosen, your bean sprouts will be ready to harvest. They should be about 2-3 inches long and pale yellow in color.
To harvest, remove the caps or plastic wrap from the bottles, and expose the sprouts to indirect sunlight for a few hours. This step will allow them to develop a bit of chlorophyll and turn green. Afterwards, use scissors to snip the sprouts just above the seeds, as the bottom part may be a bit tough. Rinse the sprouts thoroughly under cold water to remove any leftover seed casings.

KEEP IN MIND
1. Maintain Darkness
Sprouting bottles should be placed in a dark place during the initial stages. This encourages longer sprouts without much chlorophyll. When they’re almost ready to harvest, expose them to indirect sunlight to green them up.
2. Proper Drainage
Make sure the bottles drain well after each rinse. Excess moisture can lead to mold growth. If you find that your bottles aren’t draining properly, consider poking a few small holes in the bottom to facilitate drainage.
3. Temperature
The ideal temperature for sprouting is around 70°F (21°C). If your home is colder, the sprouts may take longer to grow, while warmer temperatures can speed up the process.
4. Clean Harvest
When it’s time to harvest, ensure you’ve cleaned away any remnants of the seed hulls. These can be slightly bitter and affect the taste of the sprouts.
Congratulations, you’ve successfully grown your own bean sprouts! Now, you can enjoy them in salads, sandwiches, stir-fries, or any way you prefer. It’s not only a fantastic way to add fresh, healthy ingredients to your meals but also reduce your environmental footprint at the same time.

